Monday, March 18, 2013

Easter Tree for Pennies!

Well I am in full Easter decorating mode... I found this Egg Topiary Tree on Pinterest.  So I decided to head to the 
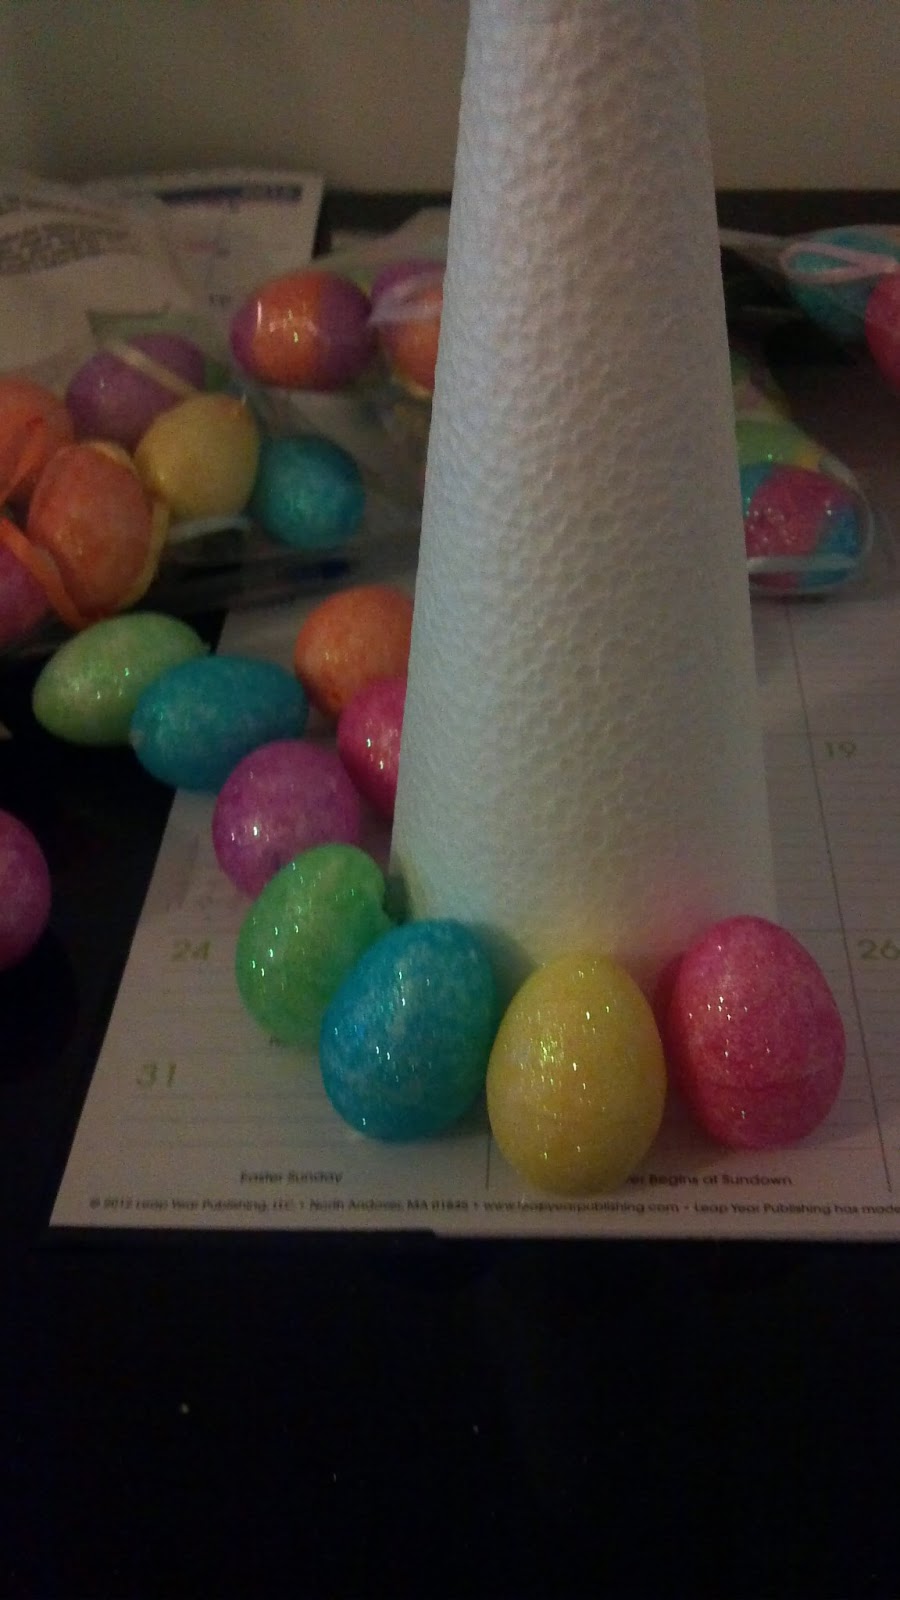
Dollar Tree and find my supplies! Now from the tutorial above I expected the cone and eggs to be much bigger but they were fairly small.
The cone is 6 15/16 x 2 15/16 and the eggs are about an inch to an inch and a half in size.  While they had all different types of grass, I picked up paper grass.  First I opened the eggs and cut off the ribbon.  I used almost 4 bags of eggs I had three left over.  I simply started at the bottom applied a little hot glue and adhered it to the tree.
I put all of the eggs on first and then I went back and added grass to fill in the holes.
I also found some eggs on a stick!  These were also $1.00 a package and I purchased 2 packages.  I also found some glasses that had this cool indent on it that are oval... kind of looked like eggs to me! Anyway they were $1.00 ask well.  The only altering I did was I cut the sticks a little bit so that some were tall, some were short and some were in between.
$11.00 later, I've got some pretty nice little decorations!


Sunday, March 17, 2013

LOST DOG


LOST DOG

HAVE YOU SEEN ME?


I snuck out of the house on Friday, March 15th around 5:30pm. 168th & Blondo area.

My name is Griffin, I have a thyroid condition and need medication!

I am very smart, and am shy around people I don’t know. 

Please contact my owners:

Email lostdog912@gmail.com

I am happy to report that Griffin has been returned to us safe and sound!

Friday, March 15, 2013

Organizing on the CHEAP!

Right now my cabinets are looking like a mess.  One reason is that I used to have a pantry and cabinet space abound but now... I have a much smaller kitchen and no pantry unless you count the lazy susan cabinet... which I don't.  So I needed to find a way to organize some of the items that I purchase in bulk.  I seriously need to avoid things like this:


I mean seriously who wants to see a bunch of that in their cabinets? So off to Dollar Tree I went.  From a previous project that I did with my Girl Scout Troop, I knew they had these fantastic containers that would do the trick!  I purchased 22 of them for $22.00 and went home and got to work!
At some point I think I will make some pretty labels but for now I just need to organize this mess that I have going on in my cabinets.  So with a Sharpie in hand I stared to label my containers and little by little got some organizing done.  I am fortunate that I can get two of these in one row and in some cabinets I can stack them two high.  Here is what I've accomplished so far!
Not bad for $22.00 and a couple of hours of my time!  My kitchen will be organized in no time!


Wednesday, March 13, 2013

Unpacking and Whatnot

Recently we moved from a 2200 square foot house to an 1800 square foot house.  Now you wouldn't think 400 square feet is a lot of room but I say it is a TON of room and I am having a bit of difficulty finding my sensible organization skill!  Right now I have approximately 20 boxes in my garage that haven't been unpacked!  I can't even think about looking at them until I find/create ways to put things in their place. 

We have this shelving unit that we purchased about 7 years ago.  Its original function was a place in our office where I put my scrapbooking supplies.  When I finally got a scrapbook room with cabinets the cubby found a place by the front door where we put all of our shoes, backpacks, mail, projects... well basically a place where we dropped everything when we walked in the door.  It looked terrible!  Eventually, I found a set of lockers at Goodwill that replaced that function and then moved it to our living room.  Where it took on a life of being a place for the kids to stuff their toys when we told them to clean up.  Yeah not what I intended it to be...Anyway in the new place it sits in a little cove off of the front door by the stairs.  I am determined that this will not return to its old junky state and once again it will be used to store my many scrapbooking and craft supplies.
As you can see, it was starting to look a little junky and I've barely unpacked anything and NOTHING in or on the cubby is remotely related to crafts or scrapbooking!  Plus one of the shelves has a pretty noticeable scratch (top middle) so I decided I needed to figure out how to make this thing look organized and not have everything exposed (but most importantly I had to cover that scratch - it was truly bothering me)!
 
I asked my husband what he thought about baskets and he agreed that it would likely give the space a more organized and cohesive look (his only requirement was that it couldn't be wicker - I don't know why but he has something against wicker). Score, the husband agreed!  You know what that means... shopping and a possible craft project YAHOO!  I searched Pinterest and the web and found a couple of good options, but it involved laundry baskets from the dollar store and fabric (fabric would be my arch nemesis) but IF I could pull of this project then it would be a simple and inexpensive fix (yeah right). 
 
So I went to the fabric store to look for patterns that I liked and that I thought would compliment this space.  Story of my life... I've got Champagne tastes on a Beer budget.  I felt the fabric was expensive and I figured I needed at least a half of a yard for each basket.  So before I spent any money I thought I better make sure I could find the laundry baskets... again story of my life... the Dollar Store didn't have any baskets that would fit in the cubby.  I decided to go to the Dollar Tree and no dice. So I went to Garden Ridge.  I knew they had a large assortment of baskets so I felt I surely would find something.  I was right and at $7.99 a piece I felt these were a good buy.
 
The baskets are made out of a seat belt type material and the bottom and top have metal reinforcements.  Nice and sturdy!  The only problem I ran into was that they only had 6 in black.  But I was able to find two more that had silver and black so I ended up buying 8 of them. Now if you were paying attention... I've got 9 slots in my cubby but I figured I would leave the center one open with the two off colored ones (at least it would look like I did it intentionally) on each side! 
I know the pictures don't do it justice but it really transformed the space and it looks much more organized than it did before.

I don't know about anyone else but when I walk into this store I cannot leave until I walk through the home décor, picture, picture frame, clock and mirror section.  Yes my husband hates going into this store with me!  In our old place I did a lot of painting and really didn't have the need or room for a lot of artwork, picture frames etc. because the walls were standard and not big blank canvases like they are in the new place.  So now I have white walls everywhere and I have the need (I mean a deep yearning, burning desire) to fill those walls with color!

Right next to this cubby is a bathroom which has black accessories (I wanted to do something light and bright but the husband insisted and well he doesn't get to make many of the decorating decisions - so I decided to let him have this one)!  Anyway, his mother passed away a couple of years ago and she collected angles.  Now many of them we gave her as gifts and his father graciously allowed us to take a few from her collection.  I wanted somehow to incorporate one of the angels that we got into this bathroom. 
Do you see my problem yet?  All of the bathroom accessories are black, the cabinet is wood and this beautiful, meaningful angel is cream and gold.  What is a girl to do... Well she shops and finds the most amazing deal and knows that her mother-in-law is guiding her to the perfect solution.  Why do I think my mother-in-law is guiding me?  Well, she had all of these little quirky sayings like "You can get glad in the same pants you got mad in", "Take your attitude back to your box" and "Hide and Watch"!  We often had conversations about friends and family responsibility.  She would say that "Friends are the family you would pick" and sometimes you have to do nice things for family even though you don't necessarily like them... this saying Friends know the song in your heart and can sing it to you when you have forgotten the words, instantly reminded me of her and that particular conversation.  I don't know how else to put it without REALLY going into detail, but this just means something to me on a deep personal level.
The frame is black and it has all of these wonderful colors and do you see the red line through the UPC... yep it was on clearance I paid $4.99 for it, SCORE!
 
So here is the bathroom before:
And after:


I kind of think I need a little floral something on each side of the picture or between the picture and the angel but I'm likely going to create that so for now I am calling it good!  I have one more wall in this bathroom that I plan on decorating with something that I make but at least there is a little more color in here now that I can work with! YEAH ME!

Saturday, March 9, 2013

Loaded Potato Chicken Casserole

Mmmmm... this was yummy!  I love my Pinterest, I found a recipe for Loaded Potato & Buffalo Chicken on Cook Lisa Cook. Which inspired me to create Loaded Potato Chicken Casserole!

Ingredients
4 chicken breasts, cut into 1/2 inch cubes
5 medium to large potatoes, cut into 1/2 inch cubes (I left the skin on)
NOTE: You basically need enough potatoes to cover the bottom of a 9x13 pan
1/3 cup olive oil
1 1/2 tsp salt
1 TBS. freshly ground pepper
1 TBS. paprika
2 TBS. garlic salt

Topping Ingredients
2 cups Colby Jack cheese
1 cup crumbled bacon
1 cup diced green onion

Preheat the oven to 500F.  I know this seems a little hot but this high temp is simply to cook the potatoes and create the crusty potato that you want! 

In a mixing bowl mix together the olive oil, salt, pepper, paprika & garlic salt, this is the sauce.  Cube the potatoes and put them in the sauce and stir it to coat.  Using a slotted spoon, take the coated potatoes and put them in a greased 9x13 pan.  Using the slotted spoon helps to leave behind the sauce in order to use it to coat the chicken.  Slide the potatoes into the oven. 

The original recipe calls for the potatoes to be in the oven for 45-50 minutes but I didn't find it necessary to cook them that long.  You are going to stir the potatoes every 10 minutes.  So while your potatoes are cooking for the first 10 minutes cut your chicken and place them into the mixing bowl and coat them with the remaining sauce. Stir your potatoes. 

During the second 10 minutes, cook your bacon.  To prepare the bacon to be cooked I simply use my kitchen shears and cut the bacon.  Cook the bacon.  Drain the bacon.

KITCHEN TIP: I never pour grease down my garbage disposal... I know, I know that is basics 101... but I also don't want to keep a can with grease in it on my counter or under my sink... it just doesn't appeal to my sense of kitchen organization.  So I take a piece of foil and line a bowl that my strainer will fit in, and place the strainer on top of the foil.  Once the grease has cooled and solid I simply wrap up the foil and toss it into the trash.

Stir the potatoes.  I typically leave my bacon in the strainer and grate the cheese and dice my green onions, mix them together and by the time I am done with that my bacon is cool enough to add to the topping mix.  Toss it all together.  Pull the potatoes out of the oven.  Immediately turn the oven down to 400F. 

Place the chicken on top of the potatoes, then top it with the cheese mix.  Slide your casserole back into the oven for 15 minutes or until the chicken is cooked through.  This is important because if your chicken pieces are too big they won't cook and you could be serving raw chicken. 

Serving the dish with ranch or sour cream really sets off the meal. ENJOY!!!